This type of email serves as a tool to increase conversion, encouraging customers who have abandoned the booking process at checkout to finalize their reservation. This tool is configurable for bookings with and without a loyalty system.
To use this type of email, follow these steps:
- Request functionality
To activate this functionality, you must contact the Witbooking support team to request the activation of the abandoned cart email.
- Sign and receive the contract
Witbooking will send the data processing contract addendum to the hotel for signature before activating the abandoned cart feature. Once signed and returned, Witbooking will proceed to activate the functionality.
- Configure the email content
Once the functionality is active, access:
1. Communication > Custom Emails > Create New > Abandoned Cart.
2. Choose template type: “Default” or “Custom”
3. Save
Important: Only one email template can be configured, which will be used for both bookings with Loyalty and those WITHOUT Loyalty.
- Review privacy policies
Verify that the privacy policies are correctly configured in Configuration > Legal Info. This configuration is mandatory for the email to be sent correctly. If it is not configured, the email will not reach the customer.
HOW TO LAY OUT THE CUSTOM TEMPLATE
Below you will find the tags that can be used and will be replaced with the values of each booking:
Customer
Name → customer.name
Last Name → customer.lastName
Address → customer.address
Phone number → customer.phoneNumber
Email → customer.email
idCard → customer.idCard
Country → customer.country
Tier (loyalty level) → customer.tier
Client Sessión ID → Can be used, but it's not very useful for the customer.
urlSession → This is the tag that should be implemented in the button to redirect to the checkout with the abandoned cart.
Important note: variables marked with HTML have HTML content, in this case, to render them they must use three curly braces {{{ }}}. Example: {{{conditionInfo.checkOut}}}
To test how the template styles look when sent via email, you can use the following link: https://putsmail.com/tests/new
Example usage:

HTML Template Example:
(styles are from the usage example)
cellspacing="0" cellpadding="0" style="width:100%"> cellpadding="0" cellspacing="0" width="100%" role="presentation" style="background-color: #234739; min-width: 100%; " class="stylingblock-content-wrapper"> cellspacing="0" cellpadding="0" role="presentation" style="width: 100%;"> cellspacing="0" cellpadding="0" role="presentation" style="width: 100%;"> cellpadding="0" cellspacing="0" width="100%" role="presentation" style="background-color: #234739; min-width: 100%; " class="stylingblock-content-wrapper"> RESERVAS: +34 921 920 300
cellpadding="0" cellspacing="0" width="100%" role="presentation" style="background-color: #234739; min-width: 100%; " class="stylingblock-content-wrapper">


cellspacing="0" cellpadding="0" role="presentation" style="width: 100%;"> cellpadding="0" cellspacing="0" width="100%" role="presentation" style="background-color: #F3EFE7; min-width: 100%; " class="stylingblock-content-wrapper"> Hi! {{{customer.name}}}{{{customer.lastName}}}, keep your {{{customer.tier}}} level and don't lose your reservation!
Don't worry, we'll keep it for a while ;)
border="0" cellspacing="0" cellpadding="0" role="presentation"> BACK TO RESERVATION
HOW TO TEST THE CUSTOM TEMPLATE:
During the development of the custom email, you can validate the JSON file's programming on the following website: W3Schools Tryit Editor
HOW TO CONFIGURE THE CUSTOM TEMPLATE:
To configure your custom template, follow these steps:
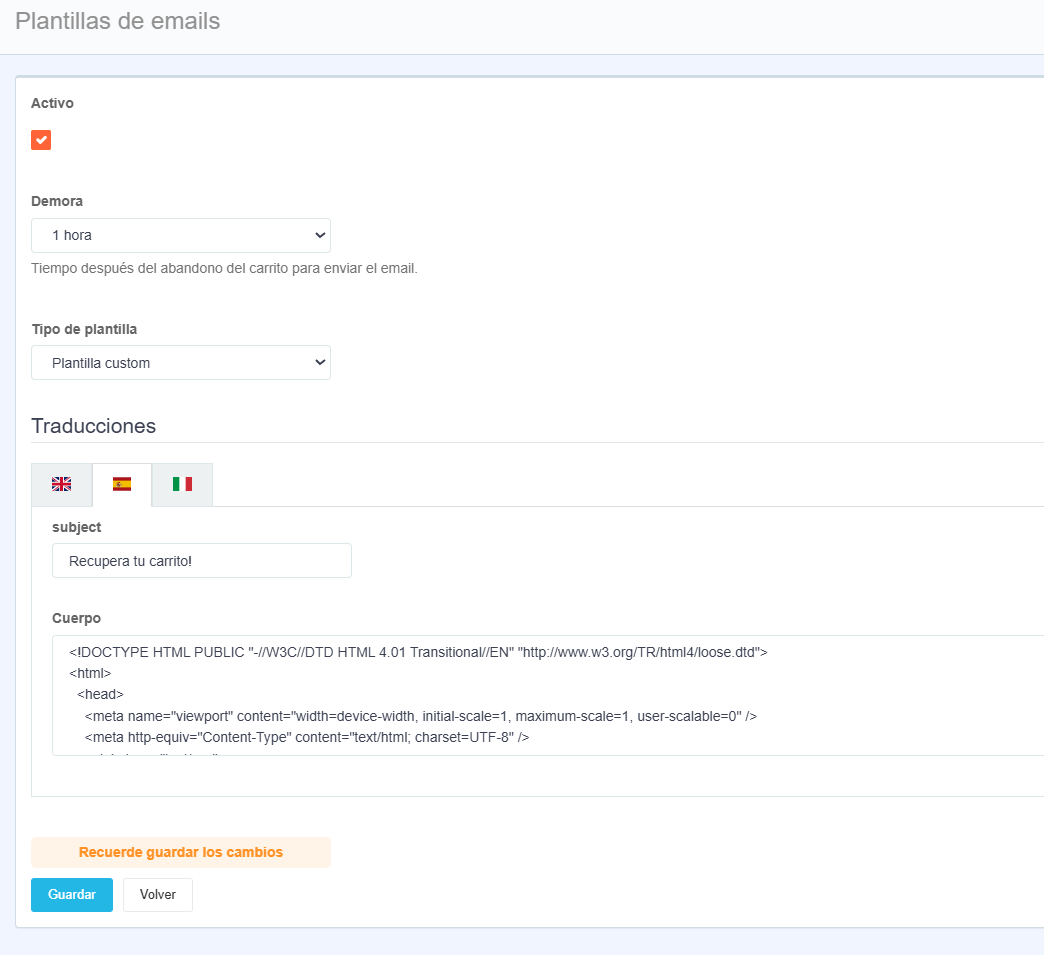
- Access from the booking engine's back office to Communication > Custom Emails > Create New.
- Active: the checkbox must be checked.
- Email Type: Abandoned Cart
- Delay: choose the time, according to preference.
- Template Type: Custom Template
- Translations
- Subject: delete the default content and enter the custom subject, according to preferences, in all active languages.
- Body: enter the custom template that has been laid out, in all active languages.
- Save.
- Perform a test to confirm it has been created correctly.
DEFAULT TEMPLATE EXAMPLE:
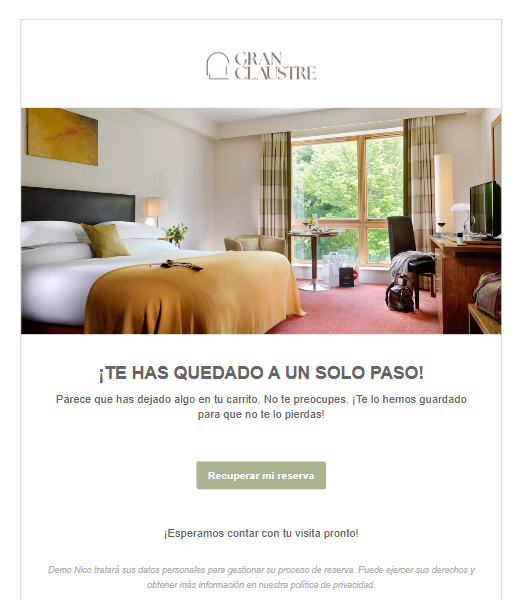
*Displays the logo uploaded in the booking engine, and the image is the first one configured in the accommodation.
Was this article helpful?
That’s Great!
Thank you for your feedback
Sorry! We couldn't be helpful
Thank you for your feedback
Feedback sent
We appreciate your effort and will try to fix the article