In this document, we will explain how to configure the inventory table step by step.
Previous considerations
Before starting with the inventory line configuration, we need to consider what type of inventory table we want to create. Currently, our system supports two types of inventory tables:
By line of inventory: each line we create will be associated with a room, an occupation, a board basis, and a condition.
By accommodation: through per-person and board basis supplements, the final room price is calculated.
Next, we will detail the steps to follow to configure the inventory table according to its category.
Per-lineinventory table type:
Before creating anything, we will need to access settings > occupant types and in the daily rate calculation model we will select “by inventory line ”.
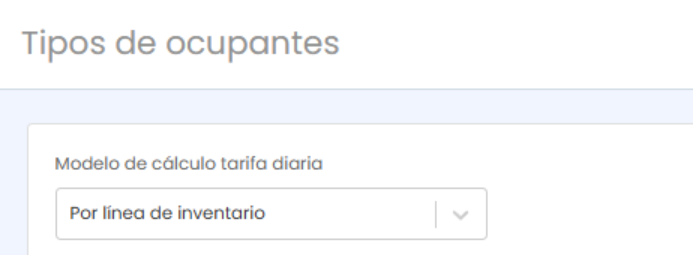
After this action, go to inventory > define inventory > occupations and create the occupations you will need for your inventory table. By default, the system will have created the most common occupation lines for you. However, you can create more from the “create new” button.
Once created, we need to create inventory lines in bulk from inventory > define inventory > create inventory lines in bulk
This section consists of 4 columns:
Accommodation type: we will select the room where we want to link the occupations, board basis, and conditions.
Configuration: we will select the occupations for the room we have selected.
Board basis: we will select the board basis for the room we have selected.
Conditions: we will select the conditions (rates) that we want to link to the new inventory lines.
Once the selection is made, to create the new lines, click “create”.
Practical example:
We want to create the new inventory line for the double room occupied by 2 adults and 1 child, with all-inclusive in the non-refundable condition. The selection we would make is as follows:
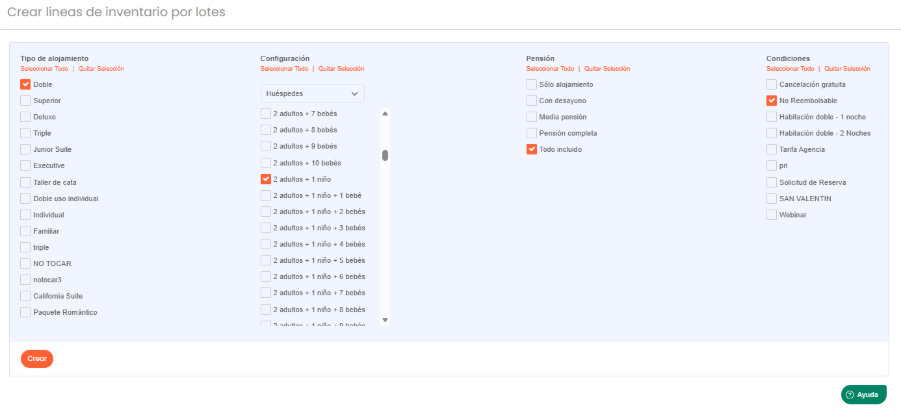
Once the new inventory line is created, we need to configure it using the inventory table Excel. To do this, go to inventory > define inventory > edit inventory via Excel and download the Excel file:
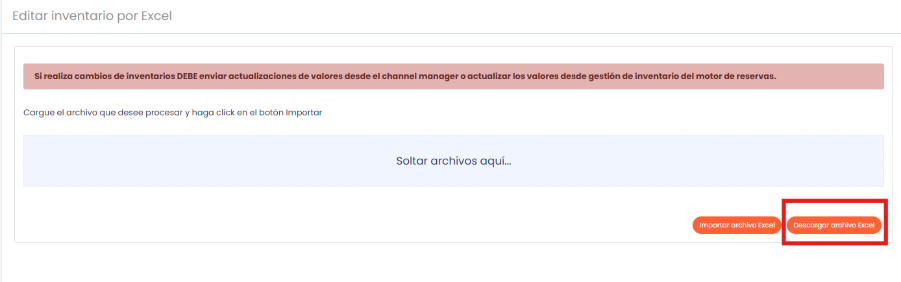 An Excel similar to this one will be downloaded:
 We should focus on columns F through V:
Rate, Availability, and Blocks
Stay and Advance min./max.
Access code
Excluded arrival/departure days (CTA/CTD)
Rack Rate
These boxes can be:
Own: each parameter is independent and can be updated by the channel or from management daily.
Shared: we will put the ticker of the “parent” line in the box to obtain the same information as another line in the table.
Formula: referenced rates. To create formulas, you must copy the ticker of a line configured as own and define a mathematical operation. It is also possible to create a supplement. To do this, enter the supplement name "c_SUPPLEMENT NAME" in the mathematical operation and a new section will be enabled in inventory > management to set a daily supplement for this.
Each box is independent, meaning the rate can be own but the availability is taken from a parent line. Next, we present a configuration example:

It is important that the “visibility” column is set to 1 if we want the line to be active. Otherwise, this line will never appear on the front end..
Once the excel is edited, we must upload it to the system from inventory > define inventory > edit inventory via Excel. Press on “drop files here...” and the window will open to search for the edited file. Select it, and to upload it to Witbooking click the “import Excel file” button:
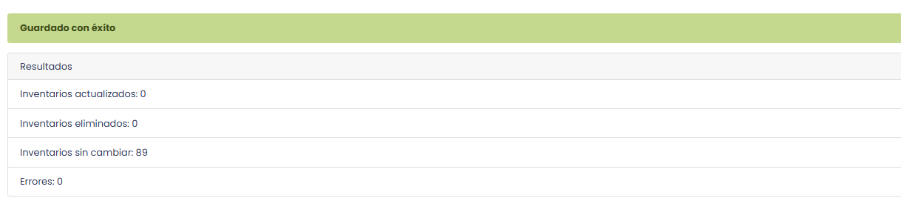
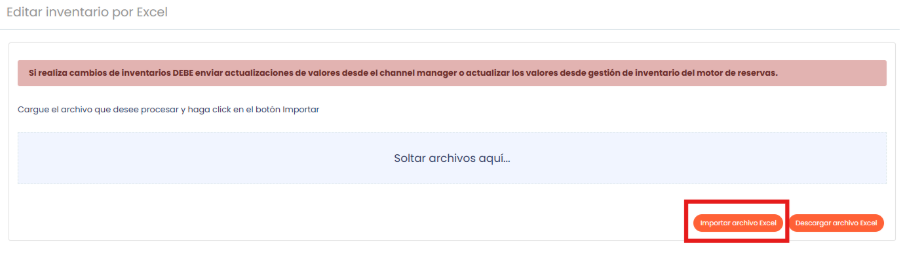 The system will indicate how many lines have been changed, how many have remained the same, and in case of error, it will return the reason for it:
Per-accommodation table
Before creating anything, go to configuration > occupant types and in the daily rate calculation model, select “per accommodation”.
 * If lines were originally created “per inventory line” and you want to change them to “per accommodation”, you must delete them. Then, you can proceed with the change.
After this action, go to inventory > define inventory > Accommodations to the rooms and their respective occupations.
When creating a new accommodation, you must specify in “Occupation configuration” the following parameters:
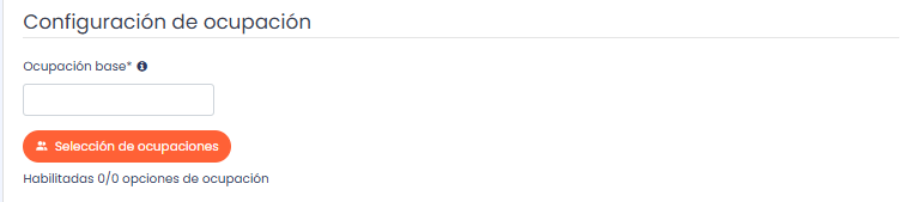
Base occupation: refers to the base occupation for calculating the accommodation price. It can be 0 or more.
Occupation selection: configuration panel where maximum occupation per type is defined:
Adults
Juniors
Children
Babies
After indicating the maximums, click the List button, which generates all possible combinations within the configured range. From here, you can:
Select all occupations.
Deselect the unwanted ones.
Save.
* In the case that a value is modified (e.g., from 4 adults maximum to 3 adults), the list of occupations will be updated.
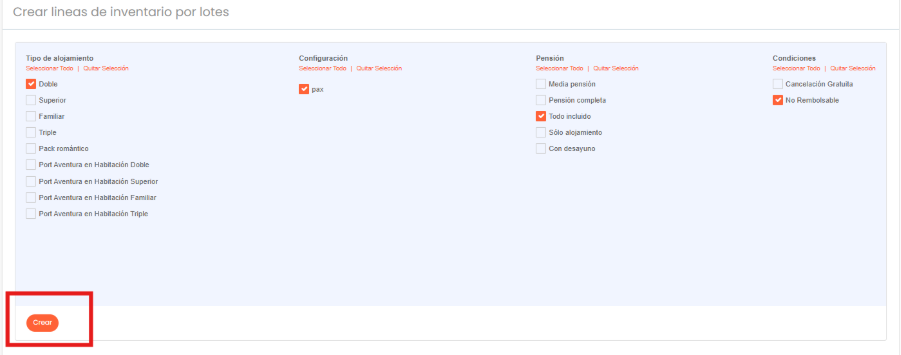
After creating the accommodations with their occupations, go to inventory > define inventory > inventory lines in bulk
This section consists of 4 columns:
Accommodation type: we will select the room where we want to link the board basis and conditions.
Configuration: we will select “pax” to create the line with all the occupations for the room.
Board basis: we will select the board basis for the room we have selected.
Conditions: we will select the conditions (rates) that we want to link to the new inventory lines.
Once the selection is made, to create the new lines, click “create”.
Once the new inventory line is created, we need to configure it using the inventory table Excel. To do this, go to inventory > define inventory > edit inventory via Excel and download the Excel file:
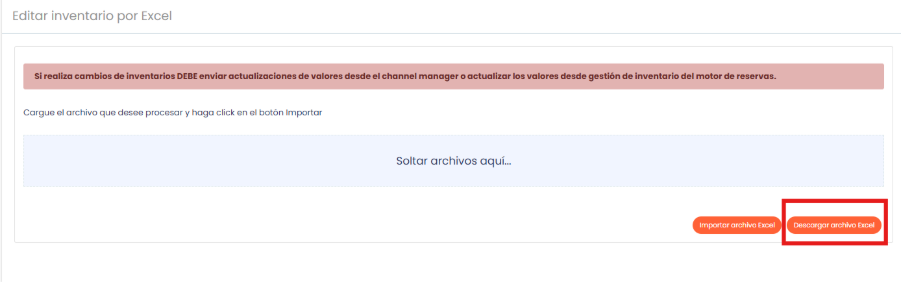 An Excel similar to this one will be downloaded:
We should focus on columns F through V:
Rate: It is important to note that this column can only contain the ticker of the line or the ticker of another line
Availability and Blocks
Stay and Advance min./max.
Access code
Excluded arrival/departure days (CTA/CTD)
Rack Rate
These boxes can be:
Own: each parameter is independent and can be updated by the channel or from management daily.
Shared: we will put the ticker of the “parent” line in the box to obtain the same information as another line in the table.
Each box is independent, meaning the availability can be own, but the block is taken from a parent line. Next, we present a configuration example:

It is important that the “visibility” column is set to 1 if we want the line to be active. Otherwise, this line will never appear on the front end.
Once the Excel is edited, we must upload it to the system from inventory > define inventory > edit inventory via Excel. Press on “drop files here…” and the window to search for the edited file will open, we select it and to upload it in Witbooking we will have to click the “import Excel file” button:
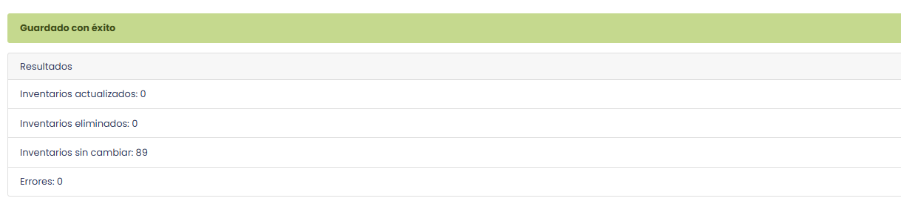
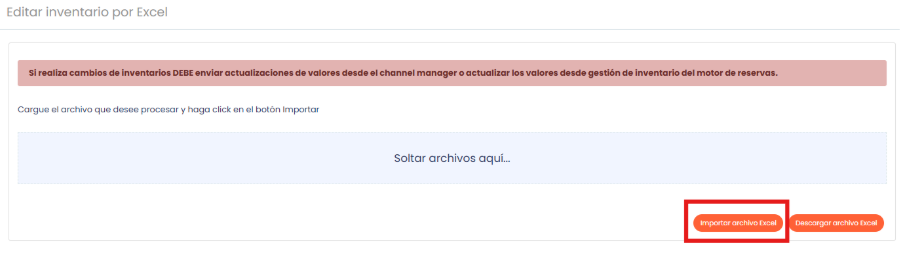 The system will indicate how many lines have been changed, how many have remained the same, and in case of error, it will return the reason for it:
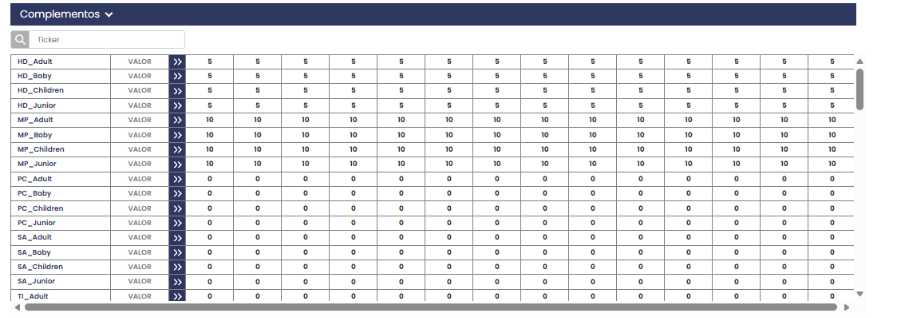
Once the inventory table is processed, as many supplements as there are occupation types (Adult, Junior, Child, Baby) will be automatically created. These supplements can be edited from inventory > management.
Practical example:
If a hotel has 2 accommodation typologies (double and superior) with 3 board basis (SA, HD and TI) and 2 rates (CG and NR), the following would be created at the supplement level:
SA --> each with Adult, Child, Junior, and Baby (therefore, 4 supplements)
HD --> each with Adult, Child, Junior, and Baby (therefore, 4 supplements)
TI --> each with Adult, Child, Junior, and Baby (therefore, 4 add-ons)
Double:
Doble_cg_Adult
Doble_cg_Baby
Doble_cg_Children
Doble_cg_Junior
Doble_nr_Adult
Doble_nr_Baby
Doble_nr_Children
Doble_nr_Junior
Superior:
Superior_cg_Adult
Superior_cg_Baby
Superior_cg_Children
Superior_cg_Junior
Superior_nr_Adult
Superior_nr_Baby
Superior_nr_Children
Superior_nr_Junior
How do add-ons work?
Occupation add-ons: these are the ones created of the type "Superior_cg_Adult" will be added to the total inventory line whenever the base occupancy is exceeded.
Pension add-ons: are always added to the amount of the rate specified in management.
Practical example: considering that the base occupancy of the double room is 2 and we have the following add-ons:
Doble_cg_Adult --> 10€
HD_Adult --> 5€
If in the inventory table there is a price of €100 per night and in the front end we do a search for one night for three adults, the system will perform the following calculation:
Board: 5 € x 3 adults = 15 €
Adult supplement: 10 € x 1 extra adult = 10 €
Total: 100 € (inventory price) + 15 € (board supplement) + 10 € (extra adult) = 125 €
If we use the same data, but do a search for 1 adult, the system will return the following result:
Board: 5 € x 1 adult = 5 €
Adult supplement: 10 € x 0 extra adults = 0 €
Total: 100 € (inventory price) + 5 € (board supplement) + 0 € (extra adult) = 105 €
General considerations for creating inventory tables by accommodation type:
Extras cannot be created by occupancy
Inventory lines with formulas cannot be created
Dynamic packages cannot be created with this type of configuration
The groups module is not available with this type of configuration
The bundling is not available with this type of configuration
The occupancy will be sent via XML in the node <GuestCounts> </GuestCounts>
Was this article helpful?
That’s Great!
Thank you for your feedback
Sorry! We couldn't be helpful
Thank you for your feedback
Feedback sent
We appreciate your effort and will try to fix the article